Viagra gibt es mittlerweile nicht nur als Original, sondern auch in Form von Generika. Diese enthalten denselben Wirkstoff Sildenafil. Patienten suchen deshalb nach viagra generika schweiz, um ein günstigeres Präparat zu finden. Unterschiede bestehen oft nur in Verpackung und Preis.
Contents

RC Vision Systems
DOMINATOR V3
MODEL FSV1063
USER MANUAL
Revision A 09/10/2015
For more product information, please visit:
All Rights Reserved
RC Vision Systems
Contents
Introduction
Congratulations on purchasing Fat Shark Dominator V3 modular WVGA FPV video goggle
with analog recording DVR, and HDMI support up to 720p. To ensure your continued
enjoyment, please take the time to read through this operating manual thoroughly before
using.
Product Compatibility
The DominatorV3 has been designed to adhere to established video standards and is
compatible with any product also adhering to accepted video standards. Due to the high
number of different manufacturers and variation in quality, it's impossible to for us to have
tested with every product combination and some troubleshooting may be required if
mix/matching components. The DominatorV3 has been thoroughly tested with ImmersionRC
gear. For best results and no compatibility issues, Fat Shark recommends ImmersionRC
gear for your accessory products.
Fat Shark only guarantees video compatibility with NexwaveRF brand modules.
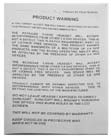
IMPORTANT!!!! Product Warning!!!!!
DO NOT LEAVE HEADSET EXPOSED TO DIRECT
SUNLIGHT. SUNLIGHT WILL MAGNIFY THROUGH THE
OPTICS AND BURN HOLES IN THE LCD COLOR FILTER
(appears as white open areas).
THIS WILL NOT BE COVERED BY WARRANTY. KEEP
GOGGLES IN PROTECTIVE CASE WHEN NOT IN USE
RC Vision Systems
Product Contents
Carry Case
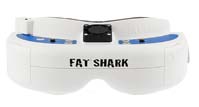
DominatorV3 Headset
w/ White Faceplate
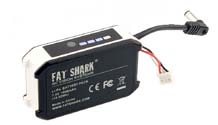
7.4V, 1800mAh Li-po Battery
w/ LED Indicator
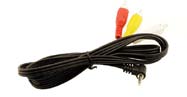
Battery Discharge Adapter
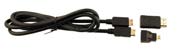
Mini to Mini HDMI Cable
w/ Adapters
RC Vision Systems
Controls Diagram
2D or 3D Mode(vertical)
Volume Level
Channel Selection
IPD Adjusters
Receiver on/off
Indicator
(Power to Rx module)
PS/2 Data Port
Earphone Jack
(Head Tracker)
Mini HDMI
DVR Micro SD Card Slot
for Analog Recording
(no HD recording)
RC Vision Systems
Headset Operation
Controls
Brightness/contrast control: pressing left and right increases/decreases display contrast.
Press forward/back increases/decreases brightness.
Display mode selection: Goggles will boot up in 2D analog. Vertical press of the
contrast/brightness button scrolls through the following modes: Analog 2D/3D/ HDMI 2D/3D.
Channel select: Pressing channel up/down buttons will cause the channel to incrementally
increase/decrease from channels 1 to 8 (see relevant receiver module for channel map).
Audio beep on channel change. A long beep sounds on channel top and bottom limits.
Low battery warning: Audio warning if input voltage drops below 6.8V
Volume control: each press of button increments volume up or down.
Head tracker: (refer to documentation included with module purchase)
RX power switch: The RX module power is independently controlled via this switch. If a
module is inserted, but desired video source is via the AV cable; the RX module needs to be
turned off to avoid image conflict.
DVR control: Connect AV cable to AV out port on right side of headset. Connect recording
device to cables and set up as per manufacturer directions.
DVR Operation
Note:
1. SD card MUST be formatted before use to ensure stable recording.
2. DVR is for analog recording only, no HD recording.
3. Do not place alternative files that you want to keep into the DVR. The DVR may not
recognize the file space and write over your files. Use dedicated SD card.
Recording:
After powering goggles, turn on DVR by depressing vertically and holding the DVR control
button for 1 full second (long press).
RED LED should now show solid.
Ensure SD card is inserted and short press to start recording (RED LED will slowly FLASH
( 2 times/second).
Short press again stops recording (turns to solid RED LED).
Playback
Note: requires turning off external receiver and removing any other AVin sources (to not
conflict with menu navigation OSD).
After turning on DVR and in stop record mode (SOLDID RED LED) depress and hold DVR
button for 1 second (long press) to enter menu.
Menu Navigation
Playback (press right to enter)
Now can see: Preview shot with file number
press up/down to change file number
Press right to play
Up/down controls playback speed/direction
Right press pause/play
Left press, back to main menu
Format (press right to enter)
Execute (press right)
Pressing left from main menu exits menu
RC Vision Systems
AV Cable Pinout
G r ound Vi deo AudR AuL
3.5mm AV Connector: Yellow: Video,
White: Audio Left, Red: Audio Right
HDMI input
The HDMI port can be connected to HDMI devices via the HDMI mini port. Recommend to
first connect to the HDMI device then apply the power from the battery (allow the HDMI
device to initiate using power supplied through the cable by the host device before powering
goggles). Disconnect battery when switching between devices to clear the settings.
Note (1): Most HDMI connectivity issues are due to either incorrect monitor settings or faulty
HDMI cable. Before assuming the HDMI is defective, try with alternative HDMI sources and
alternative cables. HDMI cables may fracture over time at connector flex points.
Note (2): Receiver needs to be powered off in HDMI mode to prevent conflicting signals
being sent to the display.
Powering Options
If multiple power sources are supplied at same time (i.e. Futaba radio and head strap battery)
the headset will draw power from the highest voltage.
ezUHF TX/JR Module
ImmersionRC's ezUHF transmitter and JR transmitter module can supply power (and head
tracking control) to the DominatorV3 goggle via a minDIN cable (included with the ezUHF).
Futaba Radio
The DominatorV3 can be powered off a Futaba radio via the Data Cable.
Note: Best to upgrade the Futaba radio to a 3S 2200mAh radio lipo pack for this type of
connection as the headset will cause extra drain on the transmitter battery pack. A normal
NiMh radio battery will not have sufficient battery life for safe flying.
Base Station
Use the AV cable to connect the video/audio.
AV cable has Y splitter with male and female DC head to share power with the external RX
supply (up to 13V). We do not recommend powering the goggles off RC packs without our
Safety Shield (see accessories) as RC packs have no current limiting circuitry to prevent fires
caused from shorts.

RC Vision Systems
1800mA Battery Pack
The latest Fat Shark 1800mAh pack with a row of
stylish blue LED indicators allows you to visually
check its remaining capacity (4 levels) to prevent a
sudden power/vision lost. It seats securely in the
headset strap pocket. The soft silicone battery
cable extends out of the top of the pack to avoid
contact with head strap. Barrel connector cable
features high strand count wire for flexibility and
long life. Wire stress is minimized by the additional rubber gasket around the cable exit. No
special charger is needed as balance leads have been added for charging with standard RC
chargers or supplying power to anti-fog mini fan on face plate (battery includes discharge
lead adapter for advanced chargers).
Note: this battery can still be charged via the barrel connector with the original Fat Shark
headset battery charger.
Battery Charging
The 7.4V, 1800mAh lithium polymer battery pack is equipped with a 3 pole balance
charger lead that allows the battery to be charged off standard RC battery pack
chargers (not included). Follow your charger instructions for setting up for 7.4V,1800mAh
Li-po. Some chargers require the discharge cable to be connected. Use the
enclosed discharge lead adapter for these types of chargers. Do not exceed 1C
charging current.
Note (1): If the charger fails to announce charge complete, but is showing battery
voltage at 8.4V, the charge can be considered finished.
Note (2): If battery becomes fully discharged or accidentally shorted, an internal
safety circuit will trip. To reset the battery, tap 9V direct to the barrel connector via
the discharge adapter cable's banana connector (black = GND, red = 9V). This will
instantly reset the battery and it can be recharged as normal.
General Lithium Polymer safety and handling instructions:
• NEVER leave a LiPo battery unattended while being charged or discharged.
• ALWAYS monitor the battery and charger during the entire charging process.
• ALWAYS charge LiPo batteries in a fireproof location.
• ALWAYS have a lithium approved "class D type" fire extinguisher available.
• NEVER charge LiPo batteries at currents greater than the "1C" rating of the
battery ("C" equals the rated capacity of the battery).
• NEVER continue to charge LiPo batteries if the charger fails to recognize full
charge. Overheating or swelling of the LiPo cells is an indication of a problem and
the battery should be disconnected from the charger immediately and placed in a
fireproof location
RC Vision Systems
• ALWAYS discontinue charging or discharging a LiPo immediately if at any time you see smoke or the battery starting to swell up and leave it in a safe fireproof location for approximately 30 minutes.
Accessories
Trinity Head Tracker
Refer to head tracker module manual for up to date and detailed menu setup instructions.
For individual radio setup instructions please visit our head tracking support forum at
Forum: Sponsors Gate/Fat Shark/Head tracker radio support.
Receiver Modules (1.3G/2.4G/5.8G)
Refer to module manuals for frequency chart.
Note: DominatorV3 only guarantees compatibility with NexwaveRF/RaceBand
modules (Fat Shark/ImmersionRC)
RC Vision Systems
Diopter Lens
For near sighted users, diopter lens insert sets are available that include -2, -4 and -6 dpt.
Peel off rubber eye cups and insert into slots seated in front of the lens. Replace rubber.
SpiroNET Circular Polarized Antenna
The best performance enhancement for your dollar. SpiroNET circular
polarized antennae are manufactured to machine tolerances and final
tested with top end RF equipment for the best performing CP antenna
on the market.
CP antennae naturally reject multipathing (biggest cause of 5G8 video
breakup) and have no mismatch polarization when your aircraft banks –
resulting in no rude range losses during acrobatic flight.
Tiny Telemetry From ImmersionRC
Conventional OSDs offer a host of features, some of which you don't
need
if you're just flying FPV around your local field or have a small and light
FPV plane that can't really carry a full OSD. All you really want in those
cases is for your tracking antenna to point at the plane accurately and
have GPS positional data along with vital statistics such as battery voltage
and current consumption.
TinyTelemetry is a minimal GPS locator that sends EzTelemetry data for the EzAntennaTracker down one of the audio channels on the audio/video transmitter. The EzAntennaTracker will then track the plane and offer battery statistics on its LCD display as well as other telemetry data such as positional info etc. The new v2.0 EzAntennaTracker will also offer audible warnings for battery voltage and total current consumption. The Tiny Telemetry plugs into the transmitter's dongle power supply located on the back of the transmitter.
RC Vision Systems
Specifications
Optics:
FOV (field of view):
Plastic optics (binocular 6p direct view optical engine)
Interpupillary Distance (IPD):
59 to 69 mm (adjustable)
Optional Diopter Lens Inserts:
800 x 480 WVGA LCD
NTCS/PAL auto selecting
HDMI Support 720p
Audio:
User Controls:
Channel Selection
Mode Selection (Wired/Wireless)
Electrical:
7 - 13 V (2S/3S supply) (fan plate to 9V only)
Power Consumption:
390mA wireless/ 230mA direct mode (no RX)
Infinite channel support on multiple bands
Modular (sold separately)
MicroSD support to 32Gb
6Mbps record rate (MJPG compression, 30 fps, AVI)
File playback (native recording, no codec support)
PAL/NTSC continuous scan auto detect/mode change
Auto save if power removed
Interface:
3.5mm AV in/out port
3.5mm 3p earphone port
MiniDIN4 data port (head tracking)
MicroSD insert slot
Mechanical:
Ergonomic molded headset w/ adjustable headband
169.2 x 80 x 45.5 mm
Packaging:
212 x 134 x 87 mm
RC Vision Systems
Operational Advice
• For best performance, select a channel that has the least
amount of interference. While the transmitter is turned OFF, turn on the video headset and look at the screen as you check each channel. Clear channels will have a consistent static background. Channels with interference will have horizontal static lines.
• Always perform a range test before flying. This includes AV
and RC controls. Some RC receivers can be affected by the proximity of other electronic devices particularly the AV TX.
• Try to space out your components as much as possible to avoid
interference to your RC control range (keep stuff away from RX)
• Do not use 2.4Ghz AV with 2.4Ghz RC controllers.
• Your 2.4Ghz TX will not affect the RC control of other RC users
(however, their controllers will affect your AV reception).
• Be aware of other 2.4Ghz RC users. If they turn their RC radio
nearby, they may knock out your image.
• Until experienced, practice flying in a familiar area to avoid
becoming disorientated.
• Due to antenna characteristics, there is a "null" in line with
antenna direction. You may experience excessive video breakup when flying overhead
• 5.8Ghz signal strength drops off very fast (2.4Ghz is more
gradual). If using 5.8Ghz, stay safely within solid AV range.
• For maximum distance it is very important that a clear line of
sight exists between the transmitter and the video headset. 2 of the worst causes of interference are human bodies and reinforced concrete.
• Place your TX antenna in open area in a vertical orientation
• Multipathing (reflections off buildings/ tall objects) causes signal
cancellation and result in broken video. Fly in open areas away from buildings or other tall structures (i.e. barns, hills).
• The headset may become warm to touch during use particularly in
the top center region. This is normal. If you are unsure, run the headset for 30 minutes fully powered before flying to ensure normal operation.
• Although you don't require any license to operate this device, you
are still legally responsible for operating in a responsible manner.
RC Vision Systems
Trouble Shooting
Observation
Possible Cause/Solution
No image, display is
- No power supplied. Check power connections.
completely dark No image, display is glowing
- If using wireless module, turn on RX power on bottom of
headset. - If using AV in cable, check video source. - Ensure TX is on and camera connections solid
Lots of interference lines
- Choose a cleaner channel.
(horizontal lines) with 2.4Ghz
- Change to 5.8Ghz AV
- Check correct frequency antenna is used
Poor image, dark or not
- Adjust display with contrast/brightness button
enough contrast Lots of interference lines
Check to see if cause is harmonic interference from 2.4Ghz
(horizontal lines) when using
RC controller (turn radio on/off).
- Use CH1 on TX/headset (Ch1 not affected by 2.4Ghz) - check correct frequency antenna is used
Head tracker not working
- Ensure module pins are aligned correctly into headset
(no response or beeping)
- Ensure correct antenna are installed - Check for other sources of interference - Ensure transmitter has clear LOS to headset. Test in wide open area, away from any obstructions
HDMI doesn't work
- 720x480 not supported by host device. - Incorrect display settings (when connected to computer, make sure output to alternative monitor is selected) - Faulty HDMI cable Before concluding the HDMI is faulty, test with alternative HDMI source and cables
White dots on LCD display
You were careless and left goggles exposed to sun. Sun burnt off LCD color filter.
Cooler optical lens are heated by your humid face causing condensation. -Pre warm goggles by wearing on head or storing in warm location - Power anti-fog mini fan on faceplate from headset battery, each time press the button can run 10min long.
Head tracker does not work
- Radio doesn't support selective trainer function
(can enter menu)
- Settings incorrect - Trainer switch on RC controller not activated - In Pause mode
Head tracker drifts or has
- Operating inside so compass sensor not correct (use
excessive error correction
- RC radio interfering with compass sensor (keep RC controller antenna away from headset - Standing near large metal object (such as a car)
Warranty
The system can be exchanged for a new unit within 7 days for any manufacturing defects if
returned in new condition. The video headset will be warranted for repair for 2 years if no
signs of excessive use. Buyer will be responsible for shipping costs. If beyond the warranty
period we will provide repair services.
Source: https://thedroneshop.co/media/wysiwyg/Products/FatShark/FSV1063-DominatorV3-Manual-RevA.pdf
JBC Papers in Press. Published on September 16, 2010 as Manuscript M110.126789 OXIDATIVE AND NITROSATIVE MODIFICATIONS OF TROPOELASTIN PREVENT ELASTIC FIBER ASSEMBLY IN VITRO* Kamal Akhtar1, Thomas J. Broekelmann2, Ming Miao3, Fred W. Keeley3, Barry C. Starcher4, Richard A. Pierce1, Robert P. Mecham1,2, and Tracy L. Adair-Kirk1
PROGRAMME: TECHNOLOGY, RESEARCH AND DEVELOPMENT SERVICES DIRECTORATE: PLANT SCIENCE A. PROGRAMME & PROJECT LEADER INFORMATION Programme leader Project leader (Researcher) Title, initials, surname Present position Specialist Agricultural Scientist Specialist Agricultural Scientist


